How to Use Gmail: Top Tips and Tricks to Hit Your Inbox
Gmail is a fabulous free tool from Google

However, the email itself can really get on top of you. One way to keep your Gmail account from getting you down is to learn all the nifty tips and tricks for the Gmail interface that will up your productivity, improve your efficiency, and even save you some precious time.
From scheduling emails to be sent at a future point to un-sending an important email you’ve just realized contains a massive blooper, these hacks will see you mastering your Gmail account instead of being scared of it.
Gmail settings 101
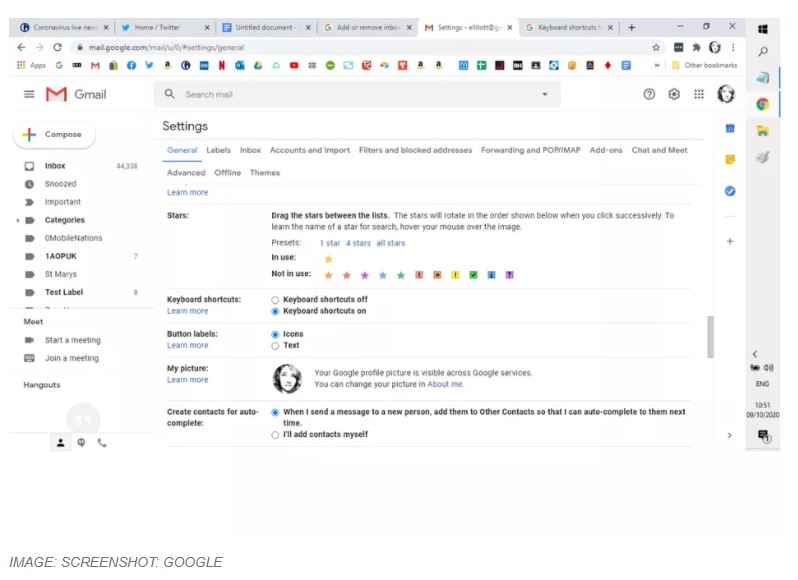
To make any meaningful changes to your Gmail, you’re going to need to access the full Gmail settings menu. To do this on your desktop in a browser, you need to click on the cog-shaped “Settings” menu icon at the top right of your screen.
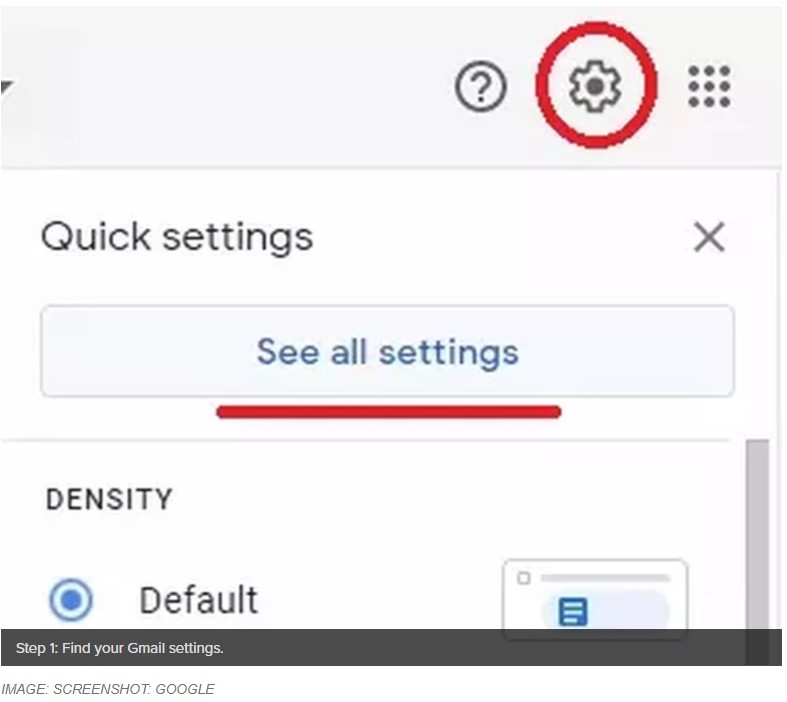
Once you click this, Gmail will offer you a “Quick settings” menu, but if you want to follow the instructions in this guide, you’ll need to click the “See all settings” button to properly proceed.
How to customize your Gmail inbox theme
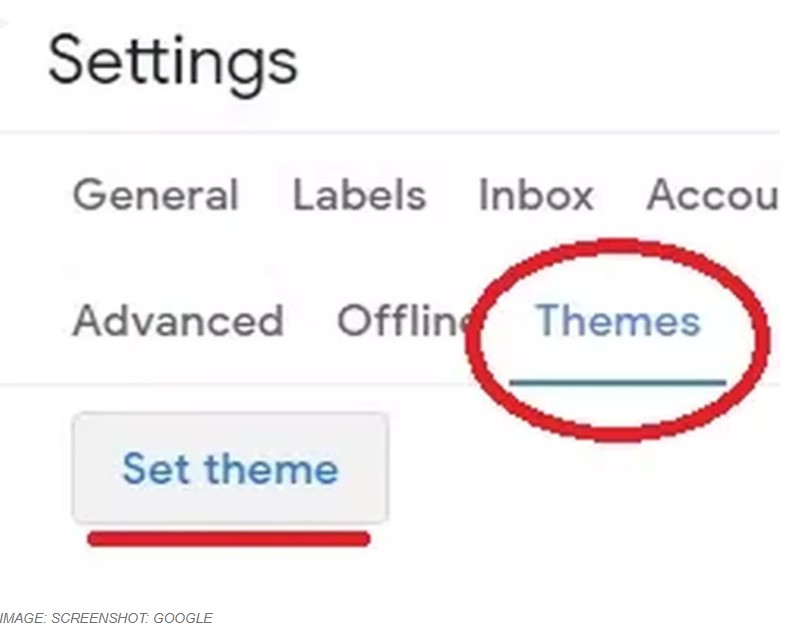
Let’s face it, Gmail’s default looks are boring. You can easily change your Gmail background by choosing a fresh “theme” to add wallpaper-style imagery to the backdrop of your inbox. To do this, head to your settings. Under the “General” tab, look at the sub-menu, click on “Themes,” then “Set theme.”
You will now see a pop-up window that gives you the option to pick your theme.
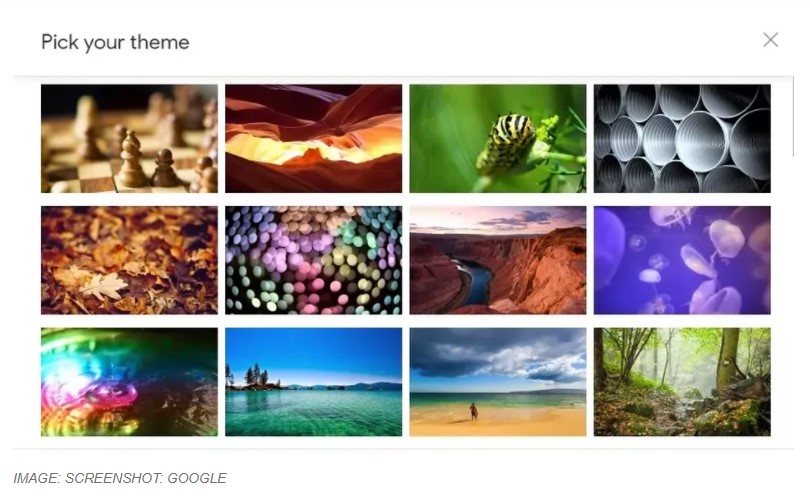
From here you can choose from one of Gmail’s preloaded featured images, which are primarily landscape and abstract photographs as well as block colors and a few illustrations, or you can select from your own images.
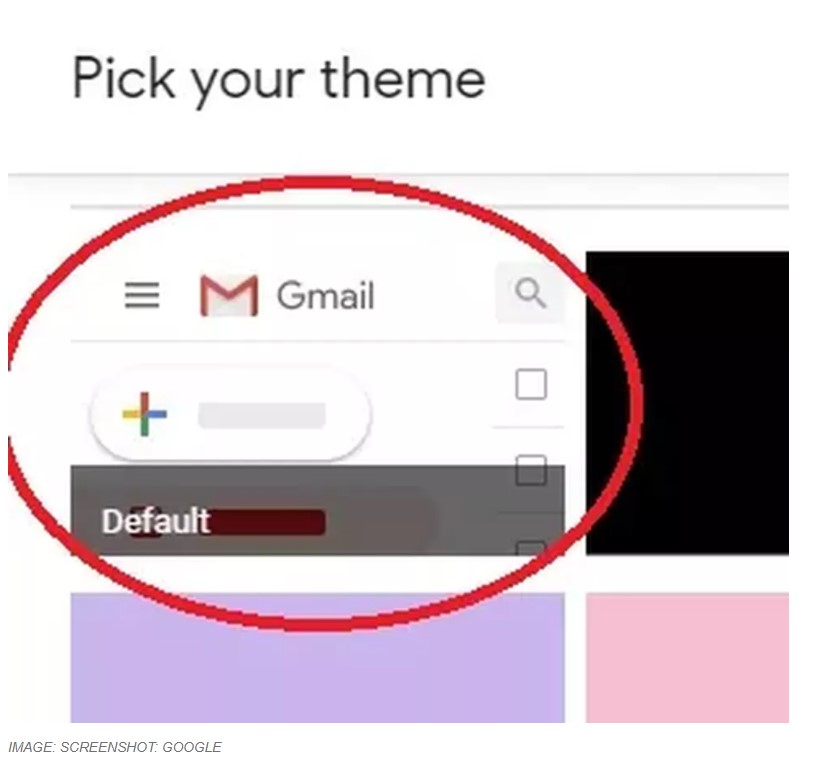
If you want to change your Gmail theme back to its original look, follow the same process, but scroll down to see the “Default” option and choose it.
How to add tabs to your Gmail inbox
One thing many people find useful is the option to divide your Gmail inbox into category tabs. This separates your mail into categories, such as notifications from social media platforms and promotional emails from eCommerce companies, to give you a more orderly view of your important mail.
If you want to do this, or at least experiment to see if it’s a useful change, head to your settings. From there, select the “Inbox” tab. Look down the page to see the “Categories” options.

Here you can select as many of the different categories as suits you. Now your inbox will feature category tabs along the top.
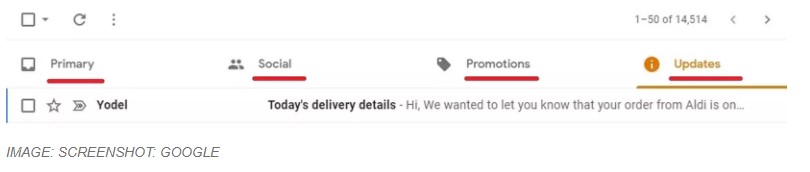
Just click on each tab to view the contents. If you want to change your inbox back to a non-tabbed version, simply follow the process above and uncheck the boxes under the categories section.
Best Gmail keyboard shortcuts
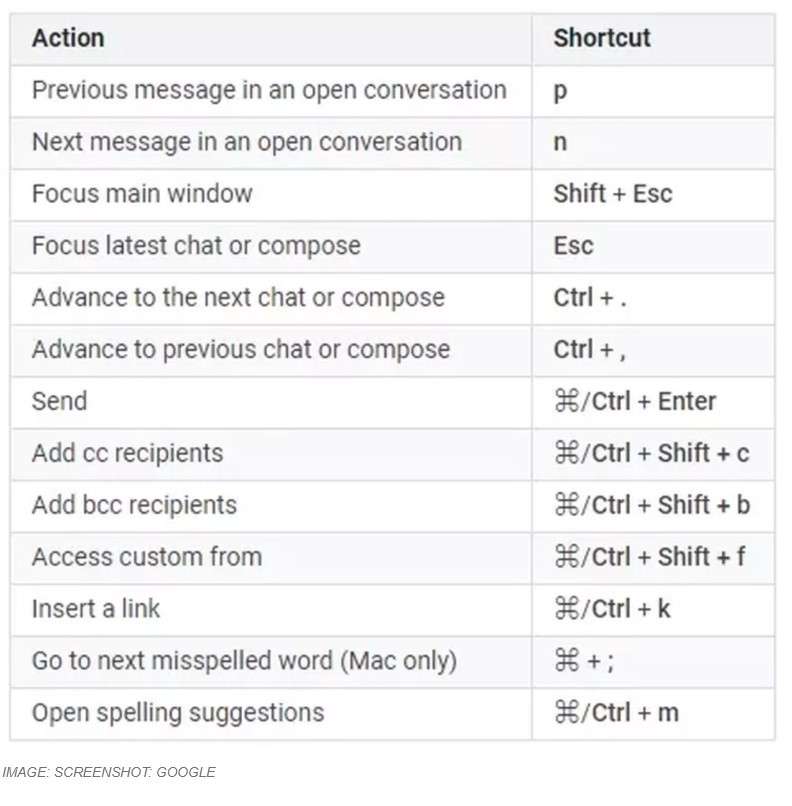
If you’re a savvy computer user who is a fan of keyboard shortcuts, you’ll be delighted to hear that Gmail offers a wealth of them. To use them, you must first ensure they are enabled. Head to settings. Then, under the “General” tab, scroll down to see the option to turn keyboard shortcuts on.
Now you can keyboard-click your way to a variety of Gmail actions. Visit Gmail’s support pages to see the full list of actions now available to you.
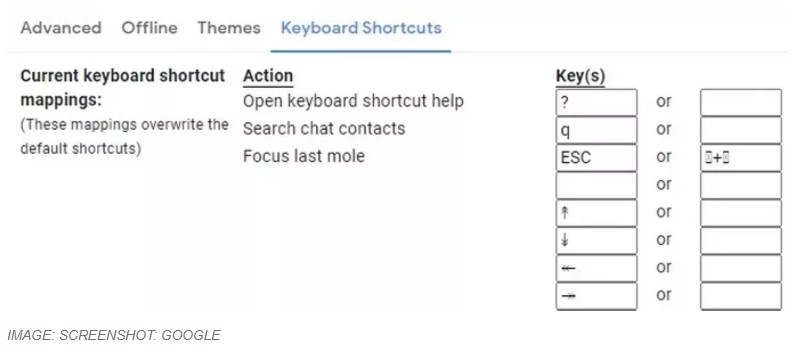
You can even change the Gmail keyboard shortcuts to custom options that better suit you. To do so, head to settings, then click on the “Advanced” option under the “General” menu. Click to enable custom keyboard shortcuts.

Once your screen has refreshed, head back into settings. You will now see “Keyboard shortcuts” as a tab option under the “General” menu settings.
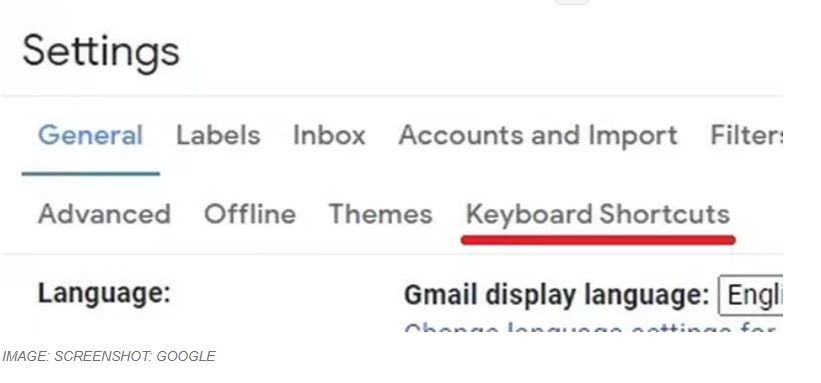
Click on this to see your options for creating your own personalized keyboard shortcut settings.
Make the most of Gmail’s Smart Compose
Gmail has a really neat feature that can save you a ton of time by helping you write emails faster — it’s called “Smart Compose.” This tool, powered by machine learning, offers suggestions as you type, reducing repetitive writing and the chance of spelling and grammatical errors. As well as finishing sentences for you, Smart Compose may also suggest contextual phrases to add.
Smart Compose should be set to on by default, but to ensure you’re making the most of this clever functionality, head to your settings menu. Under the “General” options, ensure that Smart Compose writing suggestions are on.
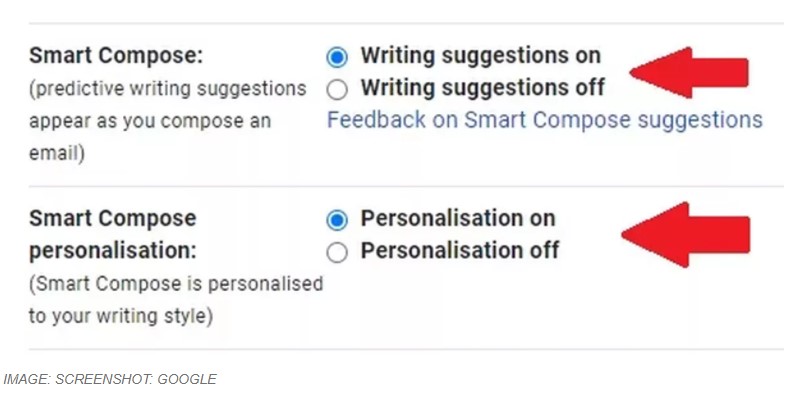
We would also recommend that you enable the Smart Compose personalization settings. This means the suggestions will be personalized to your unique writing style. When you type, you’ll see the Gmail Smart Compose suggestions show up in the greyed-out text.
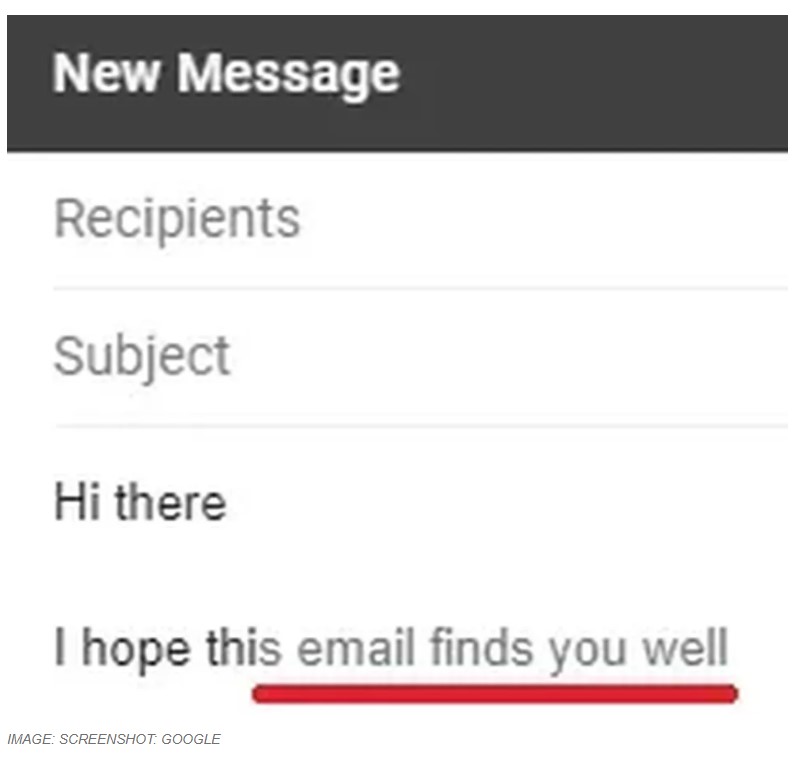
To make them part of your email’s text, simply tap the tab key to accept them.
How to organize your Gmail inbox through filter rules
Gmail allows you to create “rules” to filter your emails. This means you can manage your incoming emails using Gmail’s filters to send emails to a particular label or to automatically archive or delete them. You can also use rules to mark emails with a star or automatically forward them to another email address.
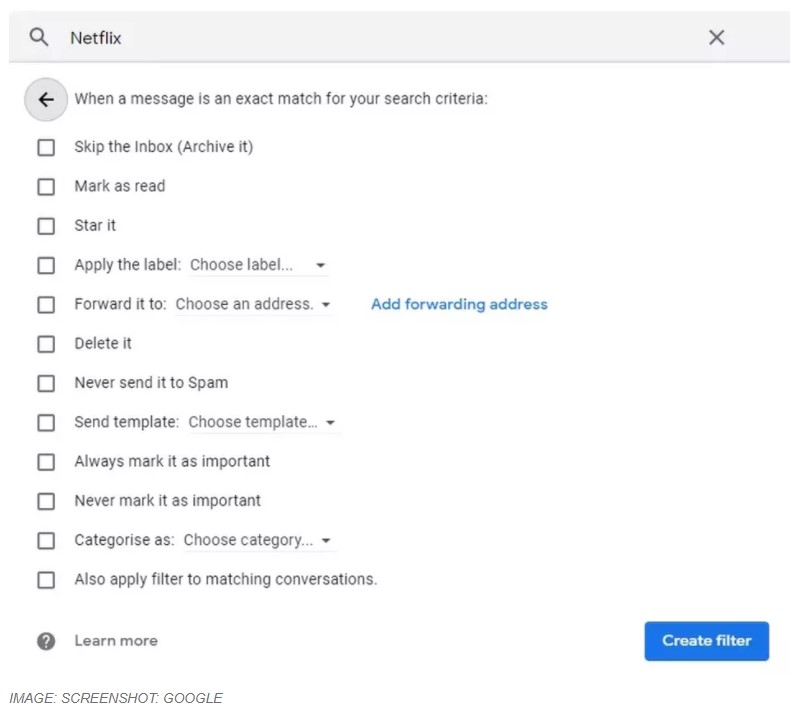
To set up your inbox rule based on a search term, simply enter the term into the search box at the top of your screen and hit the down arrow that appears to the right of the box. Now, click on “Create filter.”
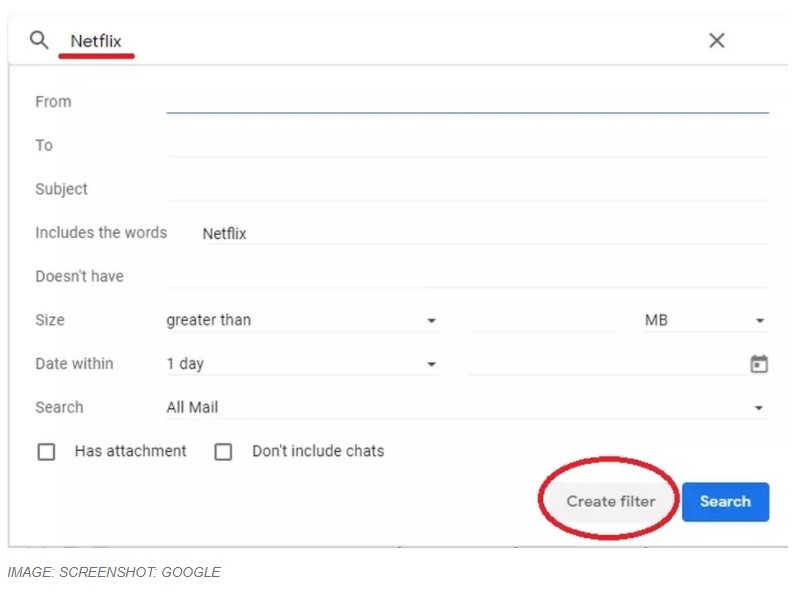
This brings up the action menu that shows you all the options you have.
If you want to change, manage, or delete your rule filters at any time, head to your settings menu. Go to the “Filters and blocked addresses” area.
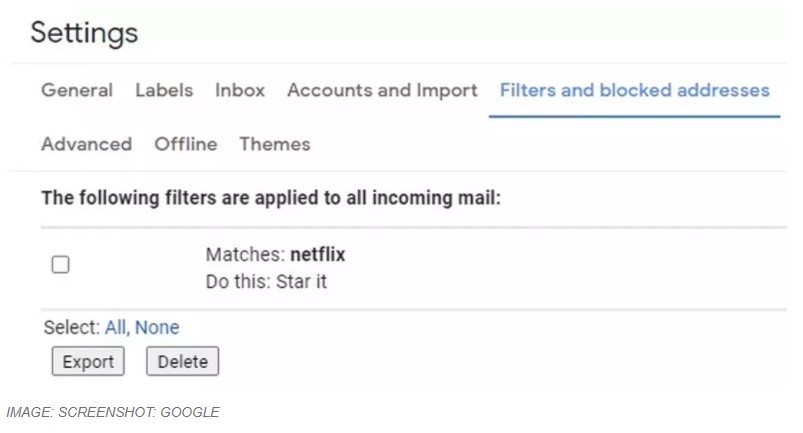
From here you can edit or delete the filter rules you have created.
How to use Gmail Tasks to maximize your productivity
Google offers a “Tasks” tool across Gmail, Google Drive, and Google Calendar to give you a digital to-do list. This is a great, free tool to help you stay on top of what you need to do, and when.
You can create up to 100,000 standalone or repeating tasks, add details and notes, set a due date and time, and add subtasks.
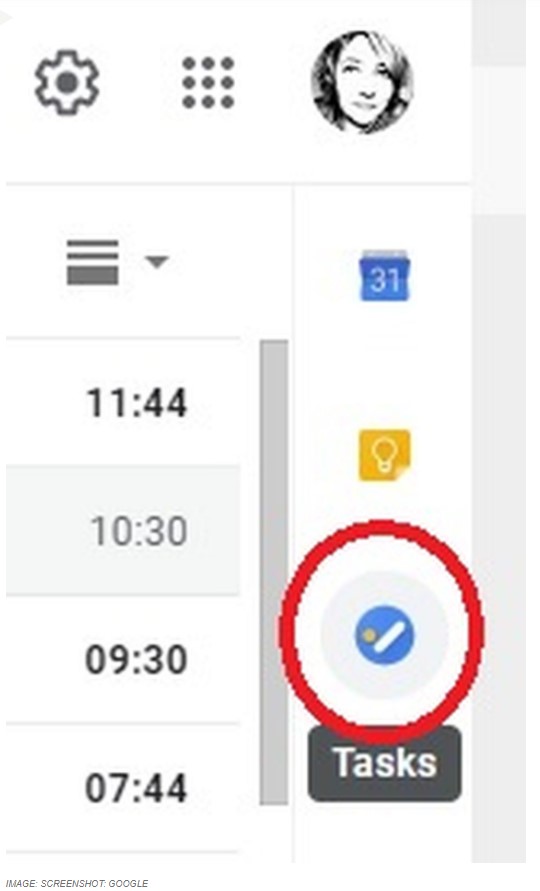
There are two main ways within Gmail to create tasks. When in Gmail look for the side panel. Click on the Tasks icon, the round blue circle with a line and a dot in it.
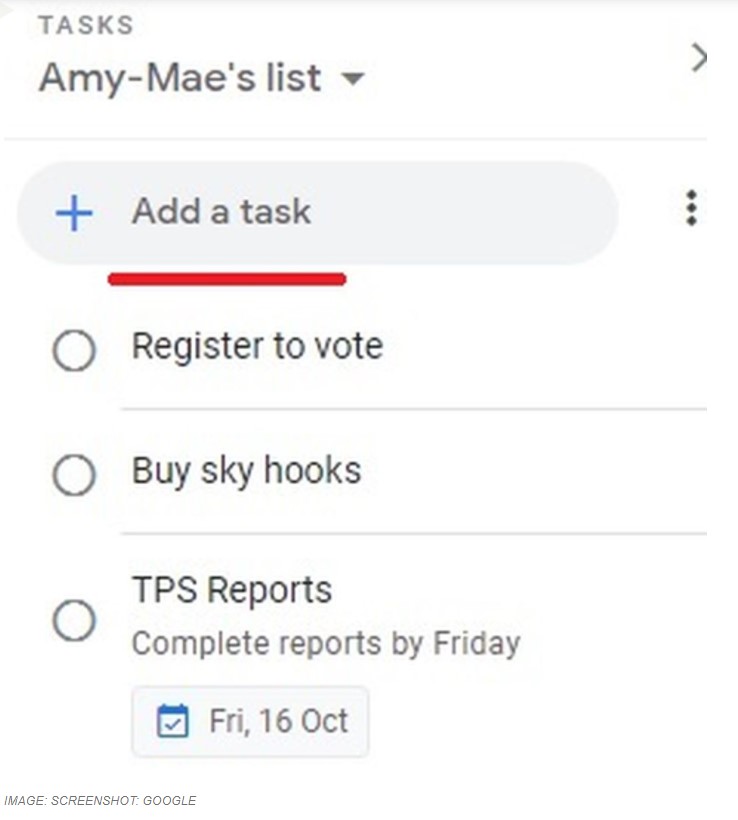
From here you can create, manage, and delete tasks and add dates and details.
Alternatively, you can create a task from an email. Simply open the Tasks tab and drag and drop the individual email you want to turn into a task into the Tasks window.
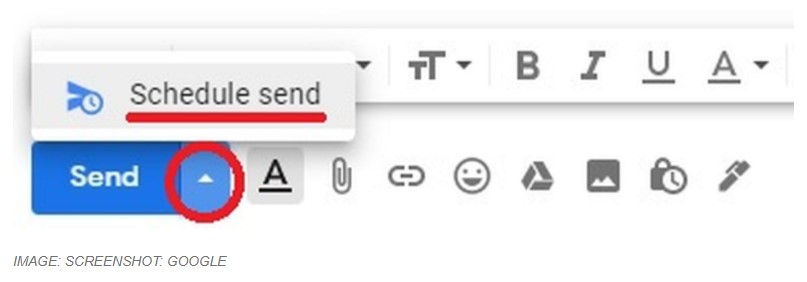
How to schedule emails in Gmail
Google offers a handy tool that lets you schedule your emails to send at a later time. Once you’ve composed your email, don’t hit “Send.” Instead, click the down arrow next to the send box.
This will bring up a pop-up window with three suggested times to send the email: tomorrow morning, tomorrow afternoon, or the next day morning. You can click to select the suggested timings.
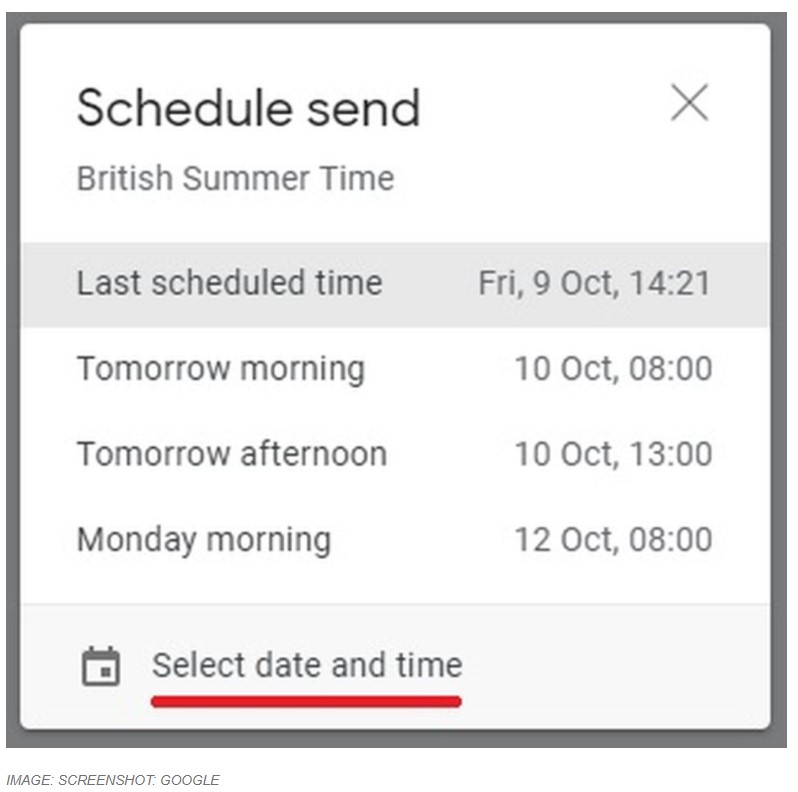
Alternatively, you can click the “Select date and time” option to see a calendar-based view of when you want to have your email sent.
It might seem obvious, but it’s important to note your emails will be sent based on the time zone you scheduled them in.
How to un-send an email in Gmail
Let’s be clear, you can’t “un-send” any old Gmail email, but this service gives you a brief window of time after you’ve hit the send button to change your mind.
To recall a Gmail email with the “Undo Send” functionality, once you’ve sent the email, as long as you haven’t already refreshed the screen, you should see a small pop-up message telling you your email has been sent, with the option to “Undo.”
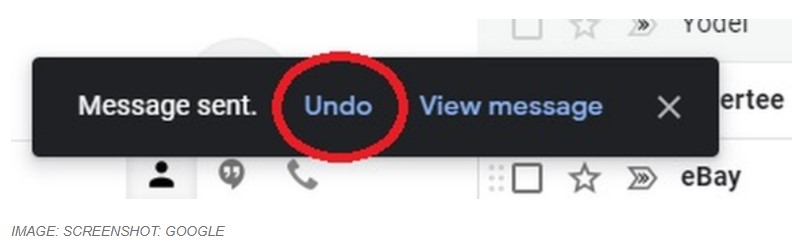
Click this as soon as you can and the email will not be sent, and will open on your screen as a draft.
You can customize the amount of time that un-send window of time lasts in your settings. Under the “General” settings menu, look for the “Undo Send” options.
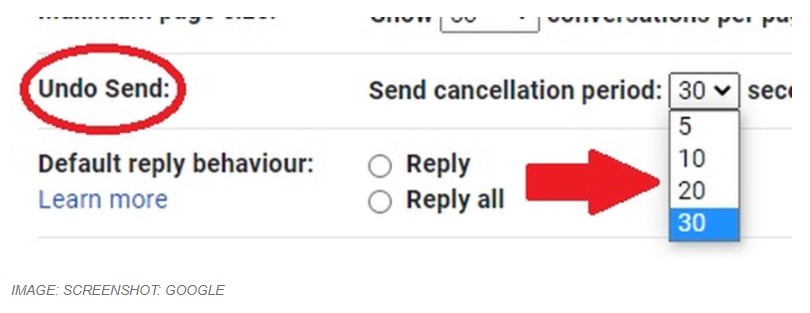
Click on the drop-down menu and you can select a send cancellation period of 5, 10, 20, or 30 seconds. We’d recommend setting it to a maximum of 30 seconds.
How to use Gmail’s “self-destruct” feature
Google gives Gmail users a “confidential mode” option that helps towards protecting sensitive information. It’s by no means foolproof, but it can stop unauthorized access and share to a certain extent.
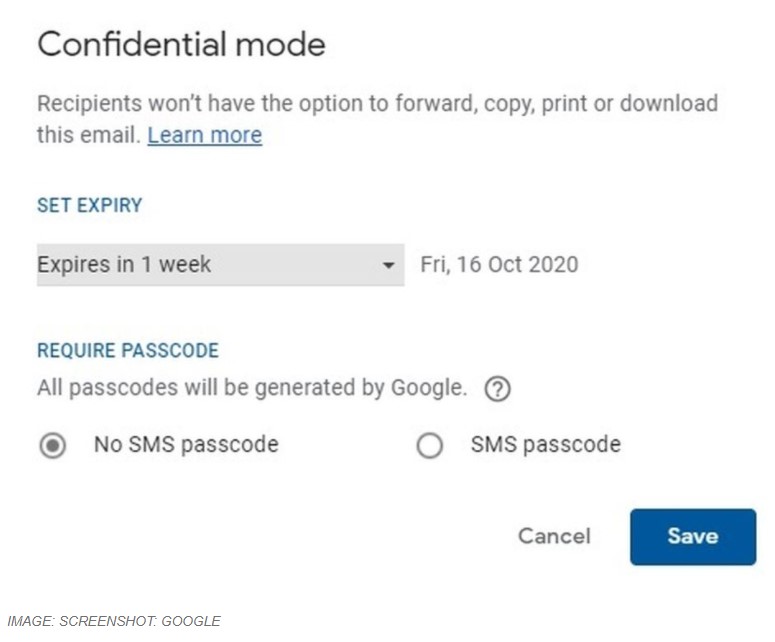
You can use Gmail’s confidential mode to set an expiration date for messages (the self-destruct option) or revoke access at any time. Confidential messages are also prevented from being forwarded, copied, printed, and downloaded.
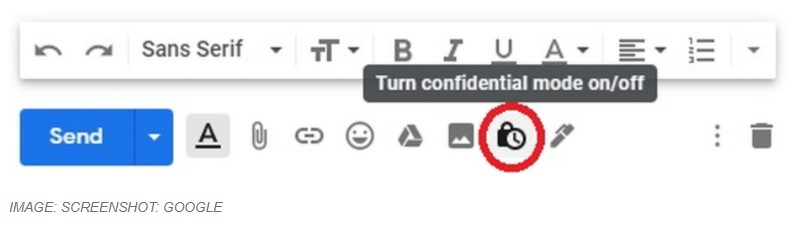
If you want to create an email in confidential mode, look at the bottom of your email compose window for the confidential mode icon — the lock with a clock in front of it.
Once you click this, you’ll get a pop-up window giving you your confidential options. You can set when you want the mail to “expire” (or if you prefer, “self-destruct”). You can also decide whether you want the recipient to require an SMS passcode to access the email here too by entering the recipient’s phone number.
To revoke access to a confidential email before the expiry time you originally set, you’ll need to find the original confidential email in your sent items. Open it and toward the bottom of the screen look for the “Remove access” option.
It’s really important to note that people can still screengrab or even photograph confidential mode emails.
How to secure your inbox with Gmail’s 2-Step Verification security feature
You can make Gmail a truly secure email service by activating the “2-Step Verification” process. This means that each time you sign in to your Google account, you’ll need both your password and a verification code that’s sent to you, usually via SMS message, but other options are available.
To activate 2-Step Verification on your Google account, you need to open your account.
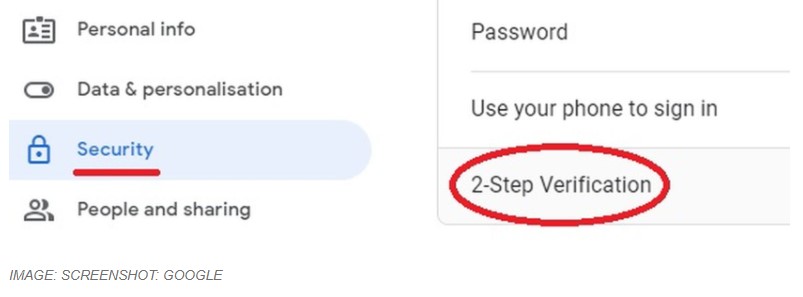
In the navigation panel on the left-hand side of your screen, select “Security.”
Under the “Signing into Google” options, toggle 2-Step Verification to on and follow the prompts that follow.
Owning the Gmail interface
While it’s totally possible to use Google’s Gmail platform out of the box, we think you’ll agree that a little tinkering under the hood can greatly improve your experience, increase your productivity, and up your email efficiency. These tips and tricks will take you from email novice to Gmail guru.
Mashable / TechConflict.Com